- Settings
- Singapore Language
- Useful links
- Home
- Find a school
- Get advice
- Why book with us
- Contact us
- Contact an advisor
- List your school
To create a new course directory that you can paste onto your website, follow the steps below.
Once you've added the code into your website, your course directory will appear within a few minutes. If you need to change the settings of this course directory in the future, you can edit it under the My course directory tab.
What is HTML?
To implement the course directory code in your webpage, you'll need to edit the HTML code of your page. If you're not familiar with HTML, this section will give you a little background. It doesn't provide instructions for editing the HTML code; for instructions, head to step 2: Paste the ad code in your page.
HTML (Hyper Text Markup Language) is the programming language in which webpages are written. This coding language is used on the Internet. Web browsers read and translate the HTML code in order to display the contents of a page.
View source code
To view the HTML of your webpage (also known as the 'source code'), first open your web browser. Then, visit the page where you'd like to place your course directory.
Once you've done that step, here are a few quick steps to see the code source in different web browsers.
If you use Chrome or FirefoxWhere to paste the AdSense ad code in your HTML
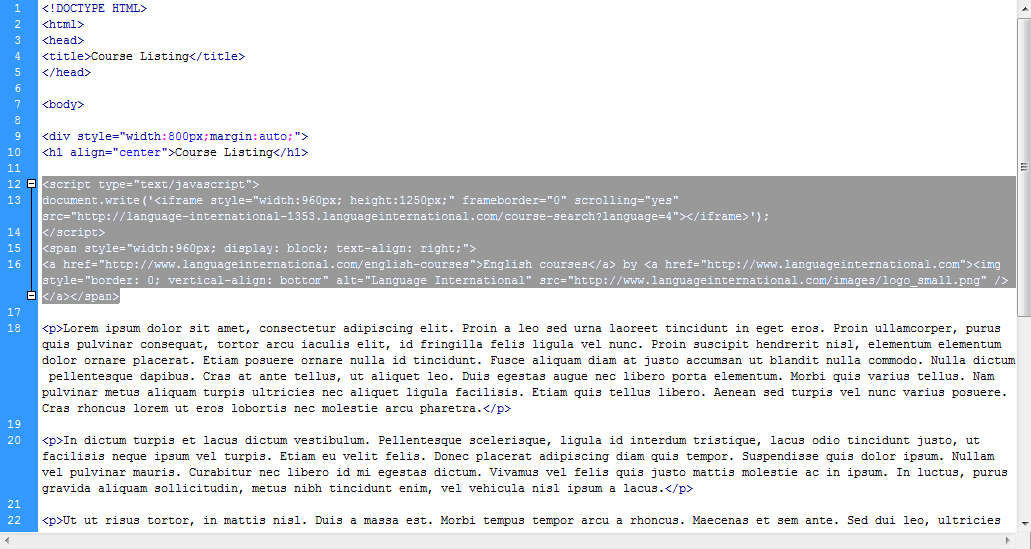
Every HTML document is made up of bracketed tags which tell the web browser how to display the HTML elements. All HTML elements start with an opening tag (< >) and end with a closing tag (). HTML documents have the following basic structure:
< HTML >
< HEAD >
< /HEAD >
< BODY >
< /BODY >
< /HTML >
The opening < HTML > tag alerts a browser that this is the start of your HTML document.
The opening < HEAD > tag contains your header information and is not visible when you view the page in your browser. Any text displayed between the BODY tags (< BODY > and < /BODY >) will be displayed in your browser.
The closing < /HTML > tag alerts your browser that this is the end of your HTML document. For the course directory to appear properly, you need to place your ad code between the opening < BODY > and closing < /BODY > tags of your source code.
If you're having trouble finding the < BODY > tags, try pressing the 'CTRL' and 'F' keys on a PC, or 'COMMAND' and 'F' keys on a Mac to open a Find text box. Then type ' Finding the < BODY > tags is important, because you need to paste the course directory code in between the < BODY > and the < /BODY > tags of the document. What's a WYSIWYG editor? What type do I use? A WYSIWYG (or "What You See Is What You Get") editor is a type of HTML editor lets you edit your webpage in a simplified, code-free view that looks similar to the actual page layout. There are two common types: If you can't find the HTML source code of your webpage in your editor, please visit the help center or support group for your HTML editing software.
Get and copy the ad code
To implement a course directory, you must first generate the code in your Language International Publisher account. If you haven’t created a course directory yet, follow these steps.
After you've customized the appearance and settings of your course directory, the code you generated is displayed in the code box.
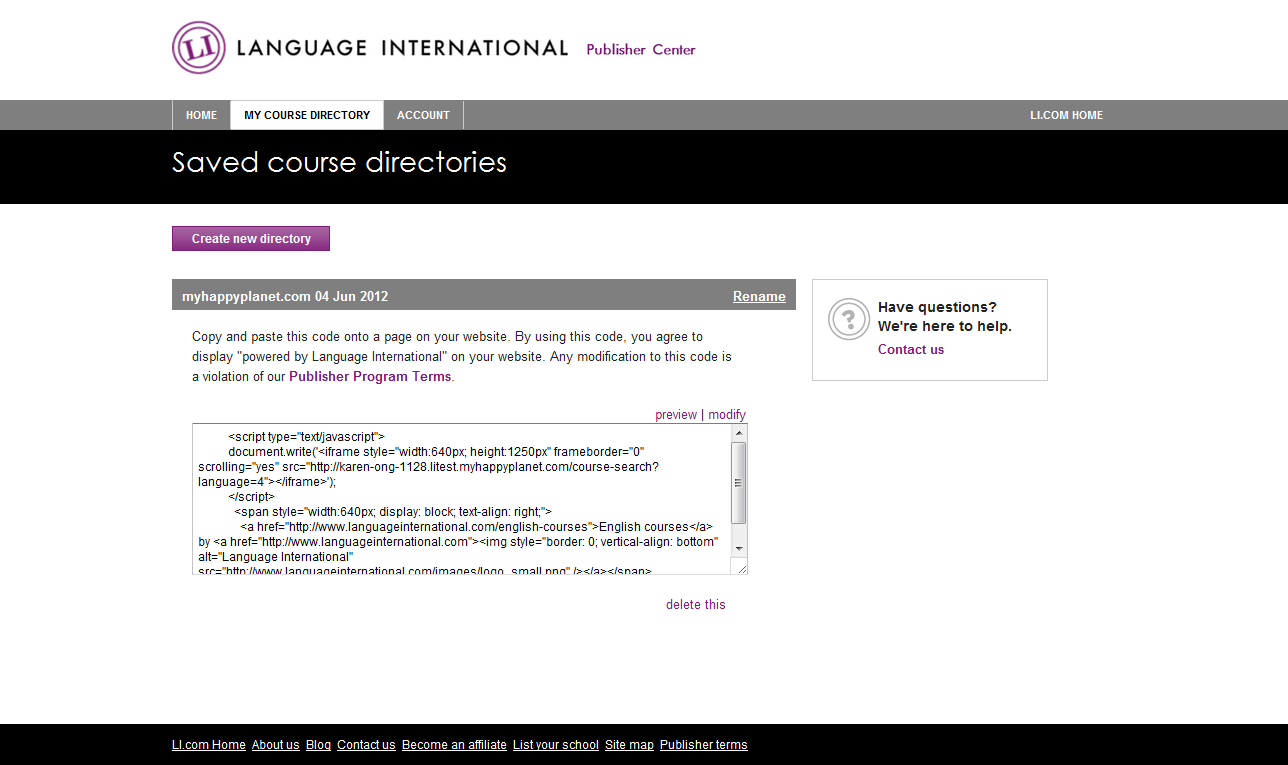
This is the code you will copy and paste into your site's HTML source code.
If you've already created a course directory but haven’t implemented the code yet, you can retrieve its code by visiting the "My course directory" tab.
Select the code by clicking anywhere in this box. You'll see the code highlighted in blue.
Next, from your browser's Edit menu, choose Copy to copy the highlighted area.
Paste the course directory code in your page
Once you have the course directory code, the next step is to paste it in your page’s HTML source code.
This guide will walk you through using two common types of "WYSIWYG" HTML editors (like Adobe Dreamweaver or Microsoft Frontpage): HTML insert editors, and Code view editors.
This guide can also help you if you have a content management system, like Blogger or Joomla. We can't give you exact instructions for pasting your ad code on your specific page, since every editor and every site is different. But we have provided some examples that will help guide your implementation.
Before adding the ad code to your page, make sure that your page complies with our program policies. If your page doesn't comply with these policies, we reserve the right to disable the course directory on your site and/or disable your Language International Publisher account at any time. If your account is disabled, you will not be eligible for further participation in the Language International Publisher program.
Using a Code view editorIf your web editor uses a code view feature, please follow these instructions for pasting your course directory code.
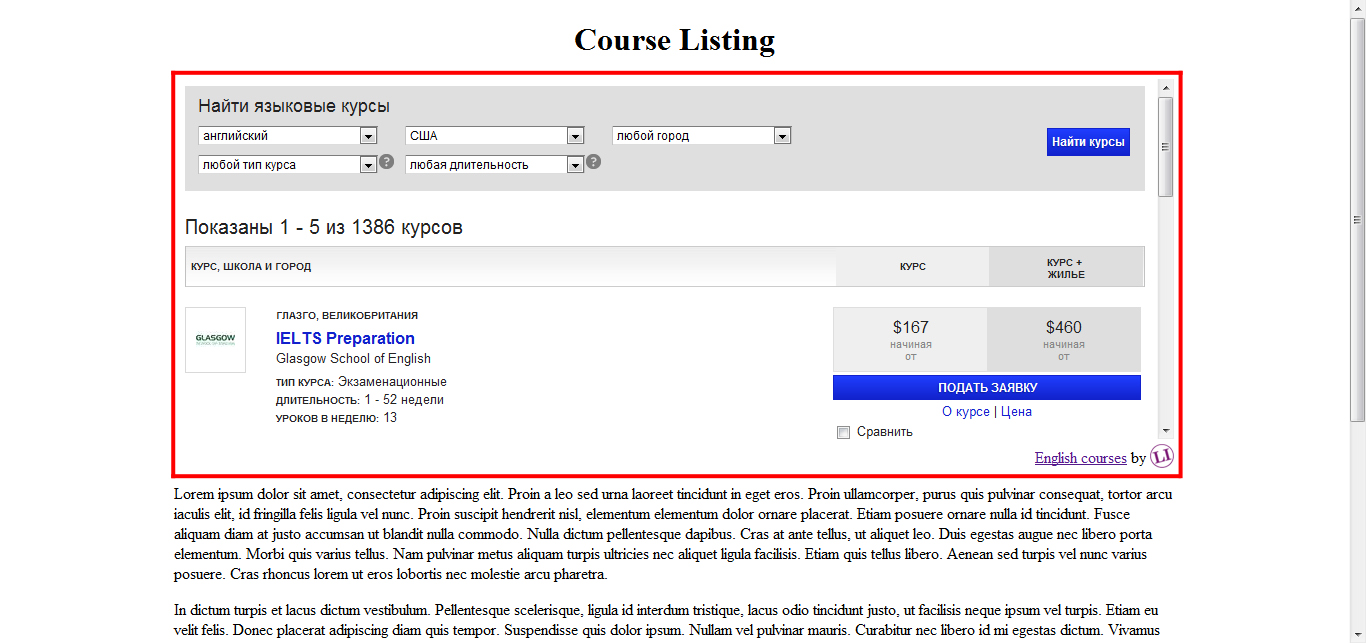
You're done! Your course directory should appear in 24 hours. If the course directory is still not displaying on your page after this time, check the Troubleshooting common issues.
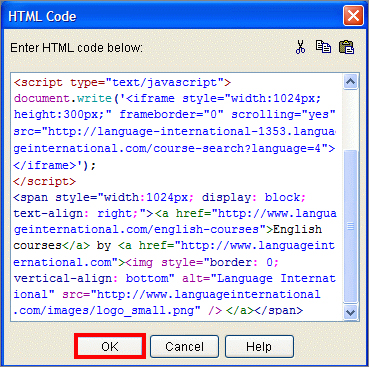
Using an HTML insert editorIf your web editor uses an HTML Insert feature, please follow these instructions for pasting your course directory code.
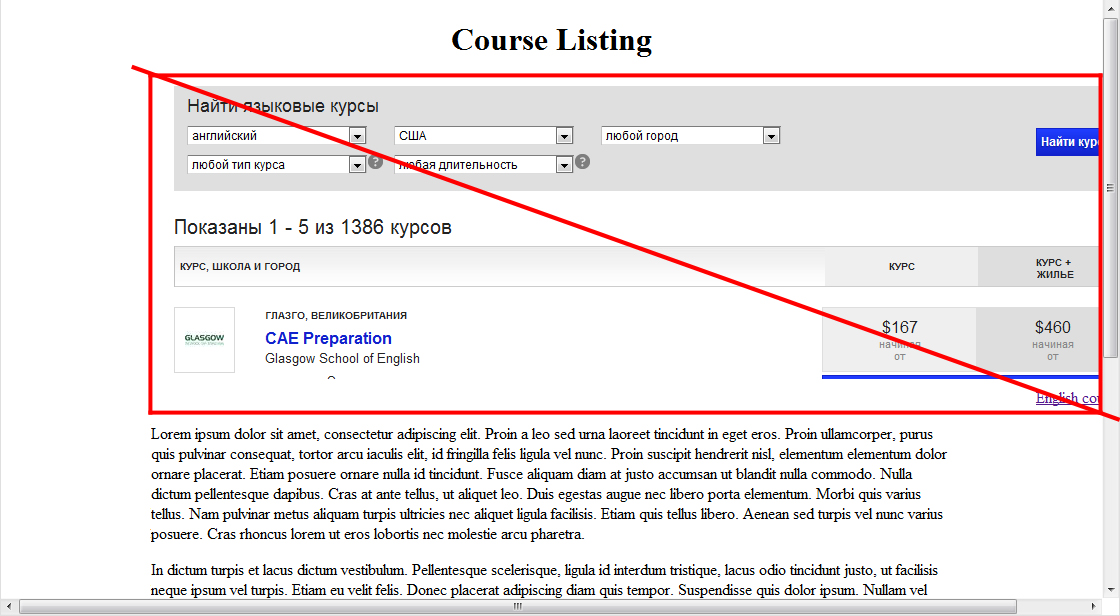
 After doing so, a new HTML box will appear. You can move this box anywhere on your website, but you can't overlap the HTML box with any other text or graphic box on the website. Overlapping will prevent your course directory from appearing or create errors when you upload the website. Also keep in mind that you can adjust the size of the HTML box to fit your layout. In this example, we've resized the sidebar so that the course directory code will fit into the main column of this webpage.
You're done! Your course directory should appear in 24 hours. If the course directory is still not displaying on your page after this time, check the Troubleshooting common issues.
If you use a content management systemIf you're using a CMS, first determine if the interface allows you to insert the ads directly. Then you can decide whether to use the Code view or HTML insert instructions.
If you need help, please contact the support for the CMS you use or search for "[name of the service] HTML help". Keep in mind that Google is not responsible for third-party plugins.
Troubleshooting common issues
After pasting your course directory code and publishing your webpage, you may not see the course directory at all for up to 24 hours.
If you've noticed that your ad units aren't showing ads after 24 hours, it's likely due to one of the issues we've listed below.
It's important to consider the user experience and the Language International publisher program policies when placing a course directory on your site. Here are some tips to keep in mind:
First, consider your users: Organize your site's content logically and make your site easy to navigate. If users can easily find what they're looking for, they'll come back to your site.
Show off your course directory: Make sure that users can easily search language courses on your site. For example, add a new “Study Abroad" tab on your primary navigation menu. Then link that tab to the page on which you have your course directory. On the page where your course directory is placed, make sure the directory is above the fold and easy to find.
Blend your course directory with your site: Choose fonts and colors that complement your site. To blend, make the font type, font size, font color, and button color of your course directory the same as those on the page where the directory is placed. For example, if the links on your site are all blue and your text is black, use blue links and black text in your course directory as well.
The more, the better: Our policies allow you to place as many course directories on your site as you want. If users can't find what they're looking for on your site, they may turn elsewhere for information.
Review your site: Take some time to explore your site and consider how first-time users might experience it. If you're using a template builder for your site, take extra care to check that the course directory is appearing correctly, including the "Courses by Language International" label.
After you've finished laying out your site, ask yourself these two questions: Is my content easy to find? Is it easy to distinguish between my site's content and my site's ads? If the answer is yes to both, then you're on the right track.
Just like other elements of your website such as images and photos, you can change the position of your course directory by using HTML tags.
For example, if you surround your course directory code with the tags < div align="center" > and < /div >, the ad unit will be centered on your webpage.
Please keep in mind that while we're happy to aid you with issues specific to the course directory code, we aren't able to provide general help with editing your HTML.
If you need further assistance with implementing the AdSense code into the design of your webpages, we suggest using the following Google search terms:
Please note: If you are currently using WYSIWYG software or any other HTML editing software, we suggest referencing your software manual or contacting the product's technical support team for assistance.
The best placement for the course directory varies from page to page, depending on content. Here are a few questions to ask yourself when considering where to position your ads:
Think like a user, and you may see your page -- and your course directory placement -- in a whole new way.
Although you may place the ad code on a page using Secure Socket Layers, we don't currently offer an https version of the Language International course directory code at this time. If you place your code on secure https pages, you may see a message asking for confirmation to load all items on the page.
We've provided some useful links for implementing the Language International course directory on several common web publishing platforms.
Note that some content management systems (CMS) use third-party plugins or add-ons to insert a course directory on the webpages generated by the system. Some do not.
CMS sites that do not require plugins:
CMS sites that require plugins
The following content management systems (CMS) use third-party plugins or add-ons to insert your course directory on the webpages generated by the system. You can use these plugins/add-ons as long as the ad code displayed on your webpage remains unchanged and is not altered by the plugin in any way.
If you need assistance with a plugin, please visit the official support forum of your service or the developer of the plugin. Please note that Language International is not responsible for malicious third-party plugins.